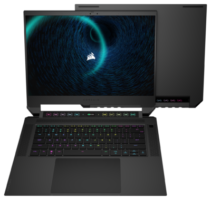
Corsair announced its first-ever gaming laptop today, the Voyager a1600. A sneak-peak was provided during AMD’s keynote at Computex today. The upcoming AMD powered device has some interesting features which are sure to get gamers and streamers excited.
Announcement video of the Corsair Voyager a1600
The Corsair Voyager a1600 is part of AMD’s Advantage program. The Advantage program promises the best in AMD processor and gpu power combined with high refresh rate screens and adequate cooling.
Specs of the Corsair Voyager include a 16″ 2560×1600 IPS with a respectable 240hz refresh rate. FreeSync Premium is supported for smooth gaming performance. With up to a 8-core, 16 thread Ryzen 9 6900HS combined with a RX 6800M the Voyager a1600 should give gamers enough horsepower to play their favorite games with ease.
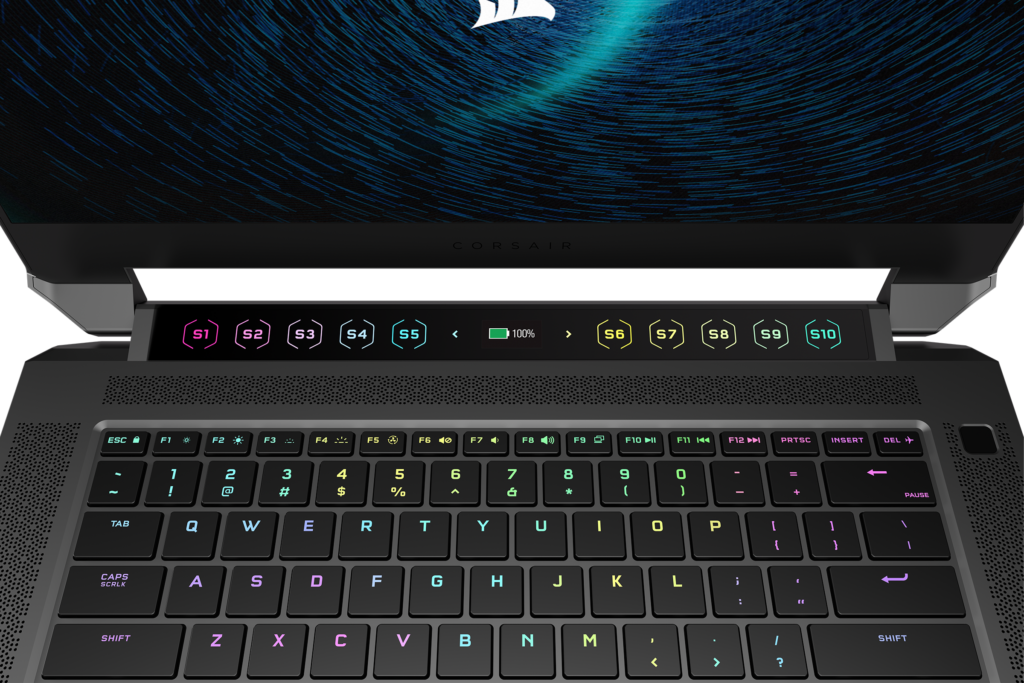
An Unique feature of the Voyager a1600 is the integration of Elgato streamdeck shortcut buttons above the keyboard. These ten buttons give quick acces to user-customizable actions without the need of an external device. Other nice additions are a high quality 1080p30 FHD webcam as well as 4 microphones with ambient noice cancellation.
The Corsair Voyager a1600 with Elgato shortcuts
Cherry MX Ultra-low Profile switches should make for a great typing experience. Corsair added their Cappelix Leds which can be controlled with their iCUE software. An integrated Corsair Slipstream Wireless receiver lets you connect up to three of their supported peripherals without taking up precious ports. Speaking of which, among these are two Thunderbolt 3-enabled USB 4.0 ports and a USB 3.2 Gen2 type-C port.
Availability and pricing will be announced later, for more information about the Corsair Voyager a1600 visit their website.
Summers are getting hotter and hotter and we can all use some extra cooling on our desk. Usually provided with by a desk fan. Unfortunately a desk fan can introduce annoying sounds around you.
What if one Noctua, a company well known for making one of the best and most silence fans stepped in the ring? Twitter user @dejayooh asked them?
Noctua quickly responded and confirmed they are planning on releasing a desk fan Q1 of 2023.
knowing Noctua though this release estimate should be taken with a grain of salt. Noctua is the kind of company that only releases something when it’s really done.
We are working on a desk fan and hope to have it our next year. In the meantime, you can also use our 5V PWM models that come with USB adaptor cables, e.g. https://t.co/IcZuoBBvcH
What do you think? Is this a homerun for Noctua or should they keep focussing on their desktop fans and coolers? At least it should have that love it-or hate-it brown look.
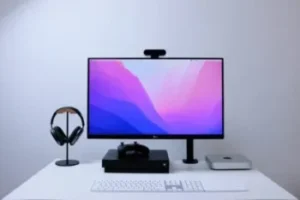
While a monitor is often an essential part of your (home) office you don’t have to sacrifice half of your deskspace for it. An easy way to tackle this is by getting an adjustable monitor arm. Luckily most monitors these days can be adjusted in height. They still have big clumsy feet though. A monitor arm can give you back your space and clean your desk up. On top of that they can add some ergonomic benefits.
Space
On your desk you probably have a mouse and keyboard, maybe some speakers like the Razer Nommo Chroma. Or maybe a picture of you spouse or cat…. Now look at your monitor…Chances are the monitor stand takes a lot of precious deskspace. With a monitor arm you can take back a lot of that space! Most monitor arms also come with a cable management system which will further help you clean up your desk.
Ergonomics
Sitting behind your desk, especially for prolonged hours can cause some serious issues. While more and more feet that come with monitors offer things like height and swivel adjustments a monitor arm also lets you change the distance between the screen and your eyes. It will also help you adjust for things like conference calls or meetings in front of your webcam. No longer will you need to maneuver yourself in awkward positions. With a monitor arm you can easily adjust you monitor to give you the center stage.
Most monitor arms offer on the fly height adjustments by using a mechanical spring or gas cylinder. A mechanical spring monitor arm will usually last longer. On the other hand a monitor arm with a gas spring will operate more smoothly and silent. Gas spring monitor arms are the most commonly used by people who want to easily adjust their monitor. There are also monitor arms that don’t use either but instead use a screw mechanism to adjust their height. This is most suitable for people who tend to leave their monitor at a fixed height.
Size and weight
Knowing what size and weight your monitor has is important. Most monitor stands specify the maximum weight they are able to hold. Check if both your monitor and arm are VESA compliant. The VESA standard is there to ensure a monitor uses a standard hole pattern on the back. There are different sizes here so check is your monitor and arm offer the same options. For example 100 x 100 or 75 x 75 are sizes commonly used.
Mounting to your desk
Mounting the monitor stand itself can be done by clamping or a screw-in hole. If you don’t mind drilling a hole in your desk the latter is usually the most secure option. Clamping gives you more flexibility though if you want to change things up.
Here’s are some great options
Arctic Z1 (Gen3)
The Arctic Z1 is a good option for those who need a set and forget solution. This stand offers easy rotation and tilt options. It comes with an USB 2.0 hub for pass through of your keyboard and mouse for example. There is no gas-lift mechanism though so adjusting the height is something you wont be doing on the fly. Arctic also offers models with usb 3.0 hubs, without USB hubs and multiple monitor support.
The Arctic Z1 (Gen3) supports up to 34″ monitors or 38″ Ultrawide models with a maximum of 15kg.
The Iiyama DS1002C-B1 is a dual monitor stand which supports up to 10KG monitors. The stand doesn’t come with an USB hub but instead offers a clean looking desk solution. Monitors up to 30″ are supported. Iiyama also offers a triple monitor version which can be found here.
The Iiyama dual monitor arm supports monitor of up to 10kg per monitor and supports both the VESA 75×75 and 100×100 standards.
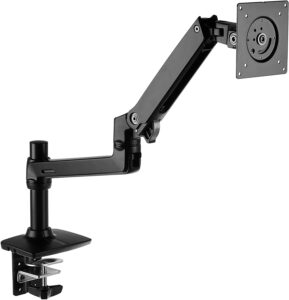
Amazon Basics Monitor Arm
The Amazon Basics monitor arm is a great bang for buck option. Its sturdy, has a built in cable management system and takes up little space. The Amazon basics arm is actually a rebranded Ergotron monitor arm. You can also buy a laptopstand to mount on the arm instead of the monitor backplate. So if you want to have both you will need to buy either two arms or a dual monitor arm with it.
The Amazon basics monitor arm supports up to 32″ monitors with a maximum of 11kg.
Dell Single monitor arm MSA20
The Dell MSA20 isn’t cheap but it is a very solid option. It is very sturdy and very adjustable. For those people who own a Dell monitor this is a very convenient option. For most Dell monitors you can just click the backplate right on the back of you monitor just like the original stand that came with you monitor does. If you don’t own a Dell monitor you can still use a normal screw-in connection thanks to its support for the VESA 100x100mm standard. The dell also offers a visual scale which will tell you if the monitor is too light or to heavy with your current adjustment settings.
The Dell arm supports monitors from 19″ to 38″ with a maximum weight of 10kg.
Final words
So there you have it, some examples to improve your ergonomics and take back your deskspace. There are of course more ways to achieve this. You could consider going with a wireless ultralight mouse and wireless compact keyboard for example. There are also ergonomically shaped keyboards like the Akko Alice and mice like the Logitech MX Vertical.
Dive into the world of mechanical keyboards and soon you will read about people lubing switches. People will talk about things like smoothness, spring-ping, switch openers. You might start to feel overwhelmed or unsure. You may ask yourself: “Can’t I just use my mechanical keyboard the way it is, what lube do I need, what tools do I need?’ In this article I will try to explain a bit about lubing along with some advice about what to look for.
If you are going to lube your switches it is important to choose the right lube.
The purpose of lubing switches.
The main purpose of lubing switches is to make keypresses feel more smooth and consistent. When lubed up the stem will slide in and out the housing a lot easier. The Crunchy sounds from bottoming out can also be reduced significantly.
You can always buy pre-lubed switches. However, lubing switches is also an important part for enthousiasts to make their keyboard feel unique
What do you need for lubing your switches?
Types of lubricant
If you are going to lube your switches it is important to choose the right lube. If your switch is of the tactile kind you will want a thinner lube. On the other hand when lubing a linear switch you should go for a bit thicker substance. For best results lubing the springs should be done with an oil-like substance.
Tactile switches
My go to lubricant for tactile switches is Trybosis 3203. It gets the switch smoother without reducing the tactile feeling. That is, if you lube it right, more on that later. Thanks to its low viscosity it is quite easy to apply with a brush.
Linear switches
For linear switches the most used lube is Krytox GPL205 grade 0. This lube has more viscosity and is more buttery-like. An alternative to this could be Trybosis 3204. Linear switches are a bit easier to lube in that you don’t have to worry about not getting the stuff on the stem legs.
Clicky switches
Personally I’d leave these alone. But if you want to lube these do the same as with the tactiles.
Springs
For the springs I recommend Krytox 105. Since The springs need to be as flexible as possible a thin oil is preferred here over a thicker lube.
What you need
Lubricant
First off you will need your choice of lubricant. For tactile switches Trybosis 3203. For linear Krytox GPL205 or Krytox 3204 and Krytox 105 for springs.
Trybosis 3203
Brushes
I recommend at least two small brushes. Grade 0 or 00 for example.
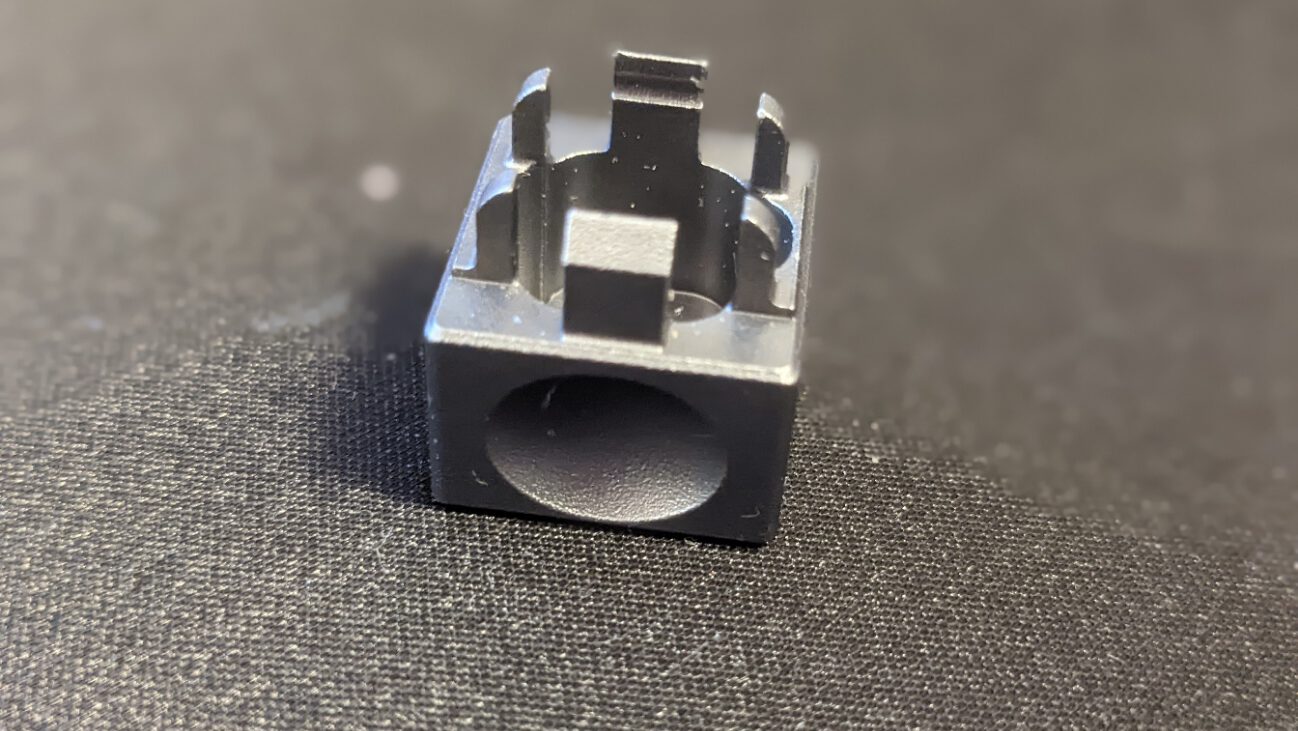
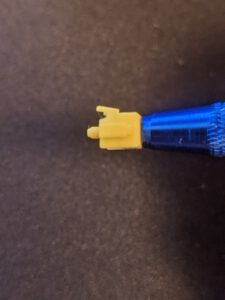
Switch opener for mechanical keyboard switches
A switch opener lets you open up the switches easy, fast and safe. There are several options here for example one from Homepage Homepage” target=”_blank” rel=”noreferrer noopener nofollow sponsored”>Ali-express or Epomaker.
Switch opener
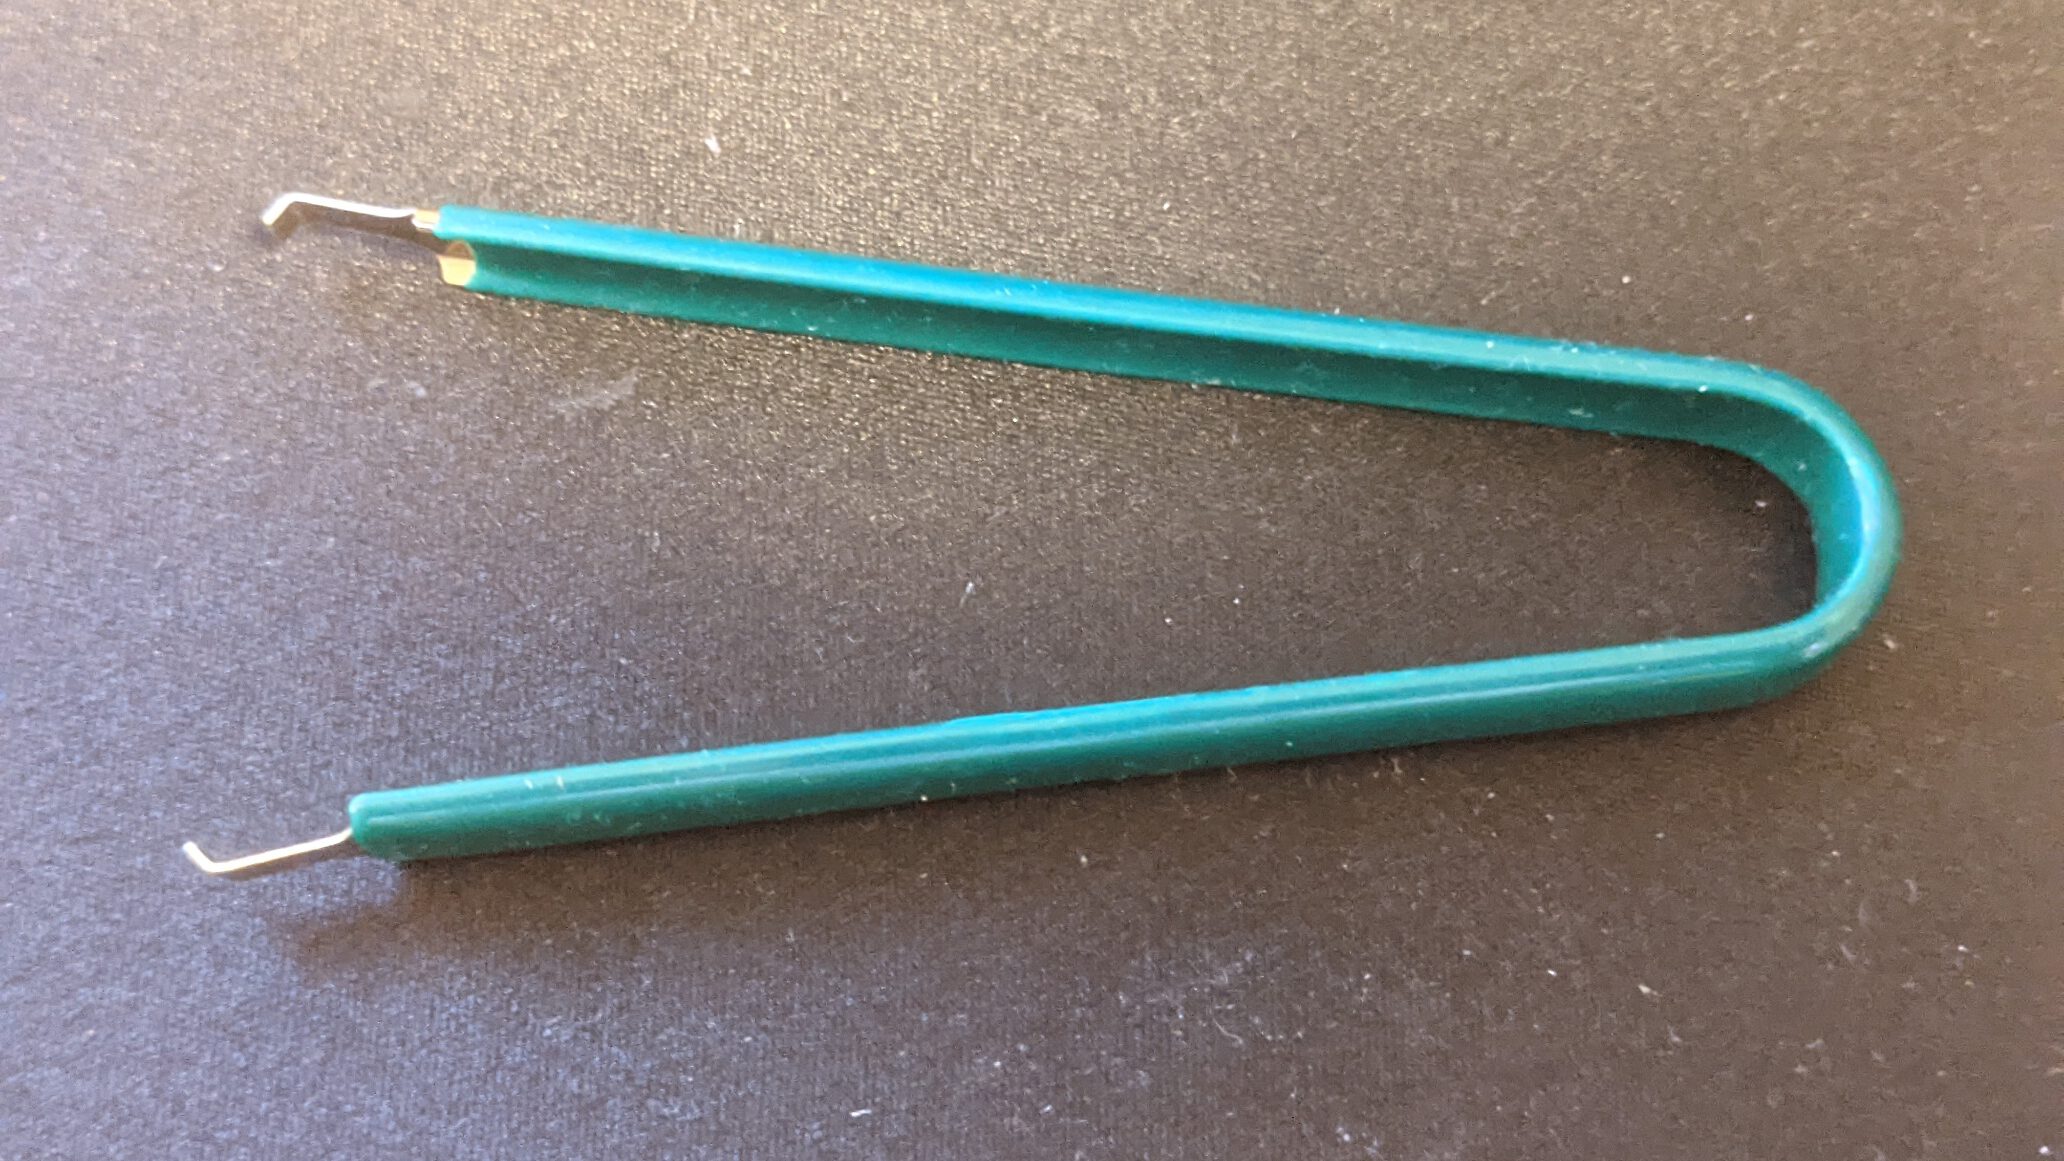
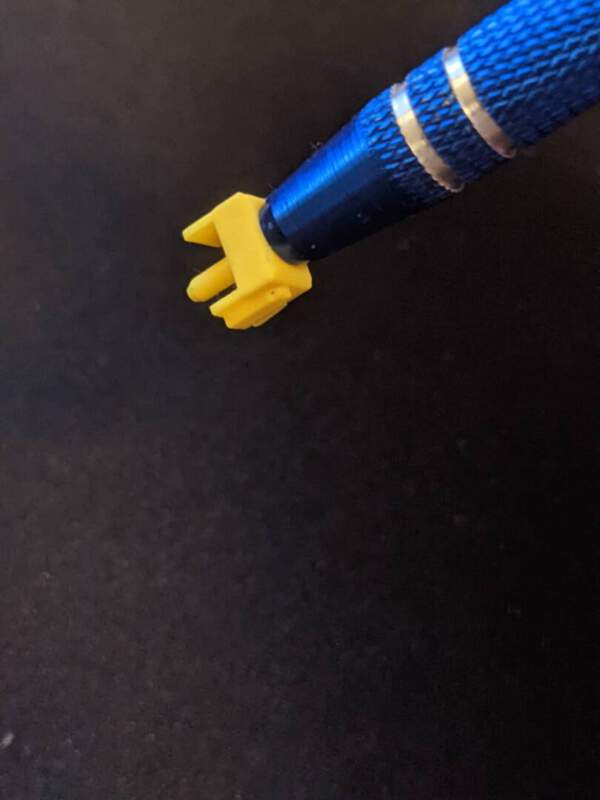
Switch puller
For taking out your switches you will need a switch puller. I recommend something like this. Its a lot less prone to making scratches then some other alternatives and gets your switches out easy. An alternative is this 2-in-1 from Epomaker.
Switch puller from Ali-express
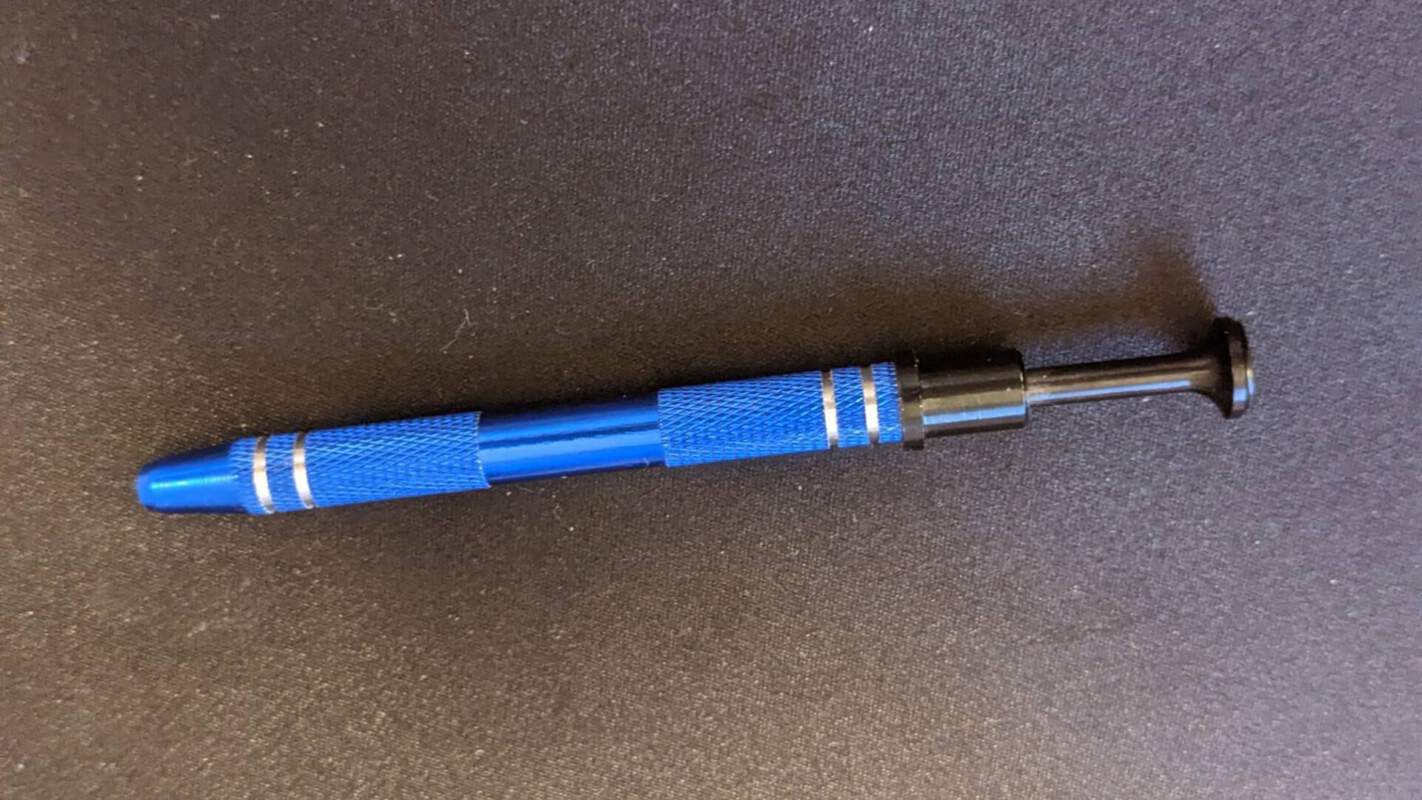
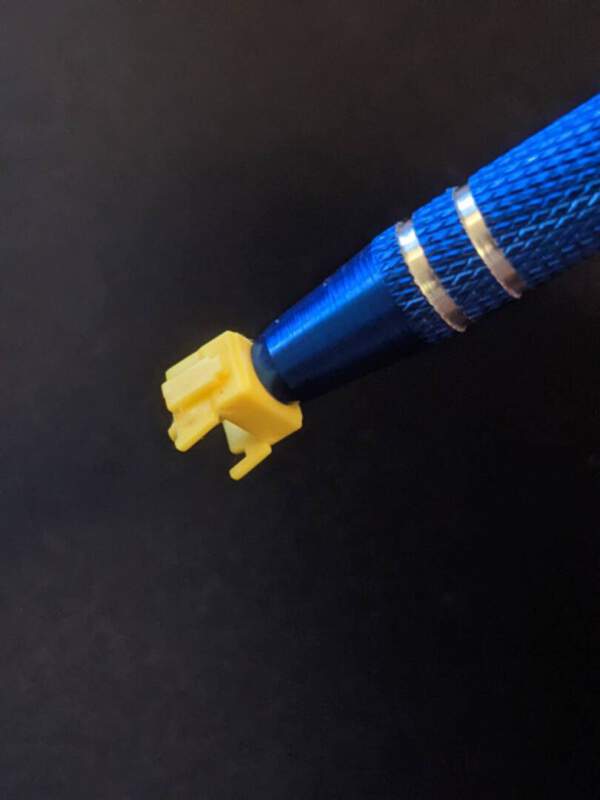
Jewelry crown
This is a handy tool to pick up your stem without getting the grease all over your fingers.
Shout out to Alex from Phoberos, Real cool guy who sells genuine lube on Etsy. He delivered fantastic service when my lube got lost in transit.
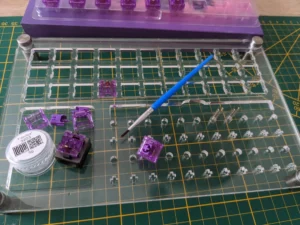
Optional
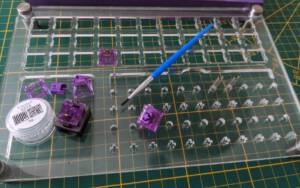
A Lubing station is an optional accessory which can come in handy while lubing a lot of switches at a time and you want to put the parts away safely.
Lubing the switches
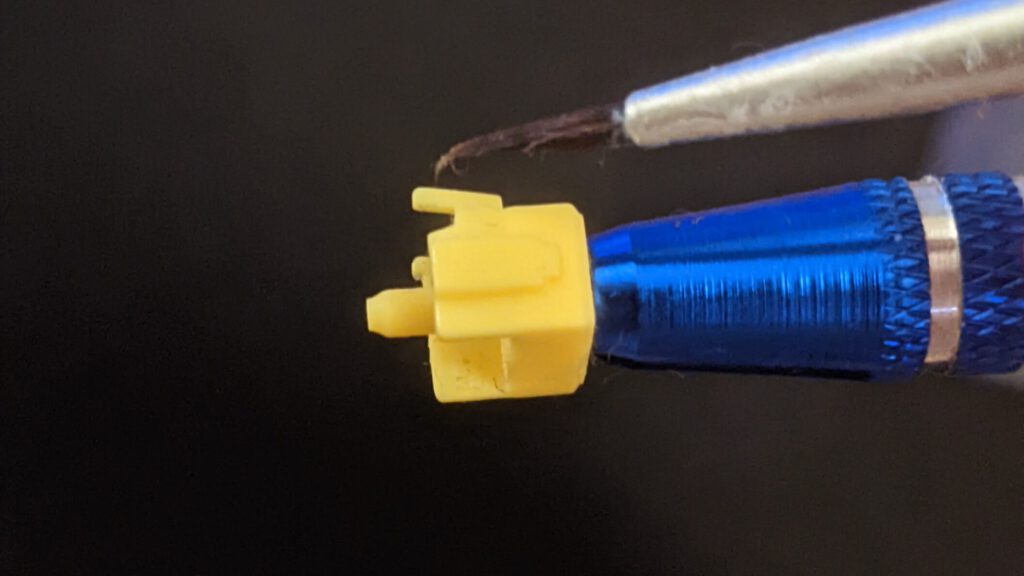
Opening up your mechanical keyboard switches
Open up the switches by putting the switch in the opener and gently press down until the top housing gets off. After gently removing the top take out the stem and spring.
Opening a switch by pressing it down gently
Housing
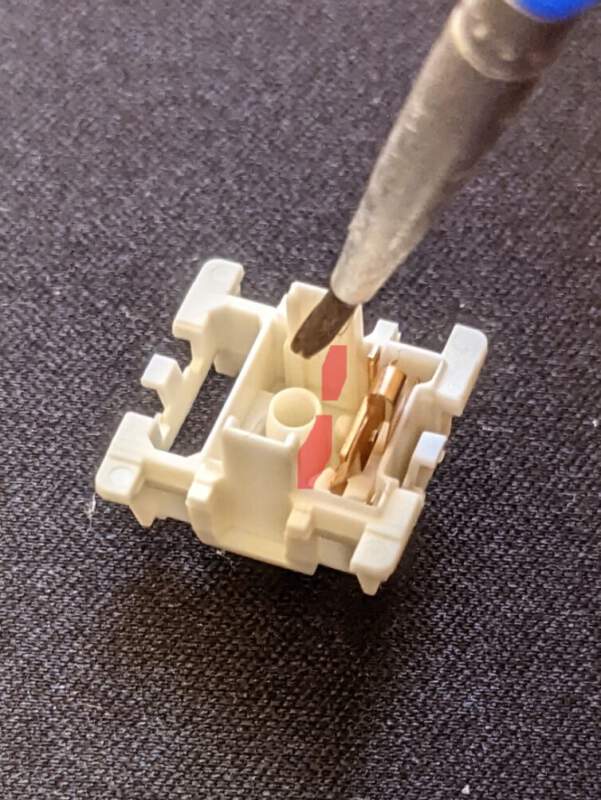
When lubing the housing a tend to do this only with the bottom of the housing. First paint on of the sides, then the other and then gently go around the outside of the center hole. All this with a very thin layer, you should not see any white residue.
The highlighted part which should be lubed: both sides and around the outside of the center hole
Stem
The front between the legs needs some lubeThe sides should be lubedLube the back as wellOnly lube the feet on linear switches
Spring
The springs can be lubed with a brush but to avoid this tedious task many people tend to “bag-lube” the springs. Simply put about a pea-size of Krytox 105 in the bag and “paint” the inside of the bag. After this put the springs in, ad a bit of air by blowing in it and shake that thing!
Bag-lubing can safe a lot of time
Done
And that’s it! you can put your switches bag together and enjoy the smoothness!
Opinions are my own. This article may contain referral links. By using these links you support this website and allow us to get products in for review and testing.
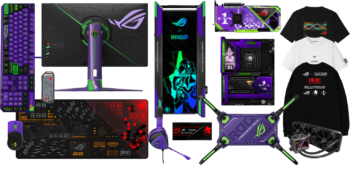
Asus has teamed up with the creators of the Neon Genesis Evangelion anime series to create a full line up of themed hardware dubbed ROG X EVANGELION. Fans of the anime series will be pleased to see they can build an entire themed setup. The fundation of any pc is the motherboard, Asus managed to make a beautiful version of the Z690 HERO supporting Intel’s current flagship processors. This board fully supports DDR5, has a convenient post code and massive heatsinks.
Among the products being launched is a Z690 motherboard in the company’s HERO line-up.
Asus didn’t stop there though as both the ROG STRIX RTX 3090 and the ROG STRIX 3080 get some ROG X EVANGELION love. The RTX 3080 and RTX 3090 are one among the most powerfull gpu’s on the market.
The ROG X EVANGERLION edition of the STRIX RTX 3090
Other stuff in the ROG X Evangelion collection
Apart from the GPU there is a Case, a monitor (be sure to get a good monitor arm) and even a themed capturecard!
A computer without peripherals is like a car without wheels. Asus must have thought the same, so they also got you covered there. There is a gaming mouse , headset and offcourse a full size keyboard in the ROG X EVANGELION line-up. Maybe a Dragonball themed line-up in the future?
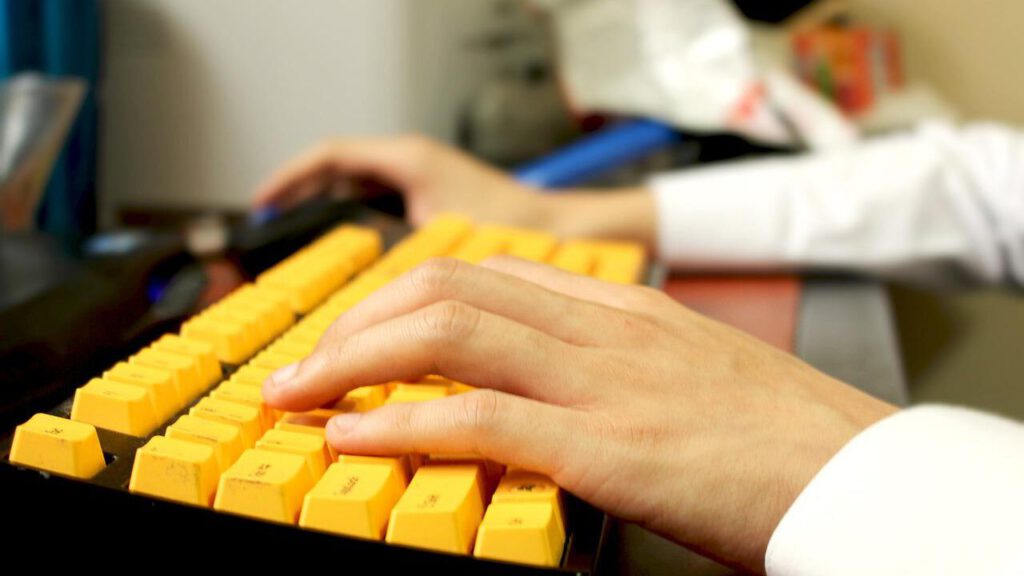
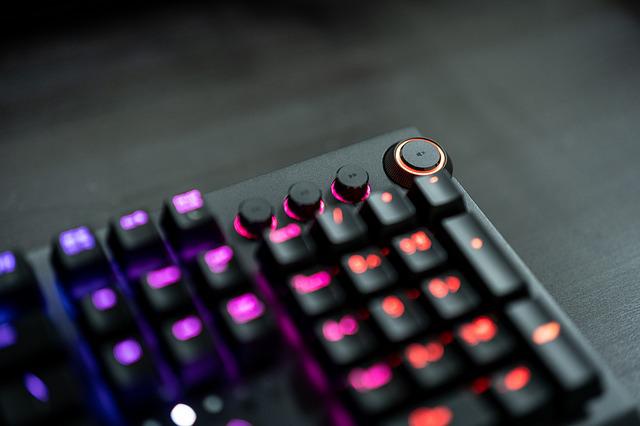
Back when I had my first computer a keyboard was a keyboard. Never would I have thought about a mechanical keyboard or things like different switches. It was just Something that just came with the computer my parents bought in the store. I personally didn’t pay much attention to it. I remember it being this big clunky creamy-white thing with green indication lights on it. All I cared about was playing games on it (Red alert and Magic carpet were the first games I had on the PC)
“After plugging in my old membrane board I immediately knew this was a relationship that wouldn’t last”
About 10 years ago I accidently dropped my laptop and my wife said to me: why don’t you try to build your own computer instead of buying a new laptop? At first I thought to myself: no way I can build a computer. Why not just get one from the store? I decided to go online anyway and put Google and YouTube to work. After diving into the world of computer parts, visiting forums and watching YouTube videos I started the adventure of building my first rig.
I didn’t pay much attention to my mouse and keyboard. I just grabbed a set from the local store and went with it. It was a simple set from Logitech, it got the job done. After a while I started thinking what I could do to “perfect” my build. Well as we all know, that is the first step into an endless loop. After changing my gpu a couple of times, I started reading more and more posts about people using mechanical keyboards and I started to get interested.
I started reading about different switches, of which at the time most mainstream boards had a selection of brown, blue and red. I watched and read reviews and opinions on these types of switches and after a while I bought my first mechanical keyboard. It was a Coolermaster Masterkeys with Cherry brown switches. I was instantly in love! The sound, the weight, the looks, never did a keyboard genuinely got me enthusiastic.
Two years or so went by until disaster struck; My cat decided it was time to puke over my beloved mech! After plugging in my old membrane board I immediately knew this was a relationship that wouldn’t last. I went online, thinking I would just order the current version of my beloved mech. Then I saw already a lot had changed. Mechanical keyboards where getting even more populair and more and more brands were pumping out boards. Brands like Razer, Logitech, Corsair, Cooler master and many others were offering all kinds of cool boards.
My previous board had red lights in it which I thought was really cool but man Unicorns were starting to puke all over these things! Eventually I bought a newer version of my trusted board instead a little less bulky and R&B lights (yes no G!).
A year or two ago I started looking at boards again. And this time the landscape had once again changed drastically in my eyes. People were getting more and more serious about mechs. Apart from the usual suspects brands like Leopold, Hyperx, Akko, Glorious, Ducky and many more were pumping out beautiful and many different keyboards. No longer was it just about looks. Things like size, colors, feeling, Hot-swap, low profile and colored keycaps were a thing now. All this was already happening in the enthousiast scene but now it started to get the attention of the average consumer as well.
After a whiIe bought myself a Glorious TKL board which really launched my enthusiasm for the mechanical keyboard hobby. Then I began experimenting with different switches, keycaps, lubing, modding. At first I started with small stuff like cheap keycaps on sites like Ali Express and Soon I found myself getting deeper and deeper in the rabbit hole…